Thursday, February 28, 2019

Spring Aerification Complete!

The Spring Aerification went to plan on Monday and Tuesday, and the rain stopped long enough for us to finish the process.  It was great to get the greens vented with holes and remove a bunch of wet organic material.  Last week we received over 4 inches of rain, so it was perfect timing to aerate and add some clean sand.  I will show you a step by step process in photos of how we carried out this years aerification.

Here is #2 Overlook green before we start the process.  The greens are very healthy now after a long winter of rain, so they should recover quickly.  First step in the process is to topdress the greens with sand.

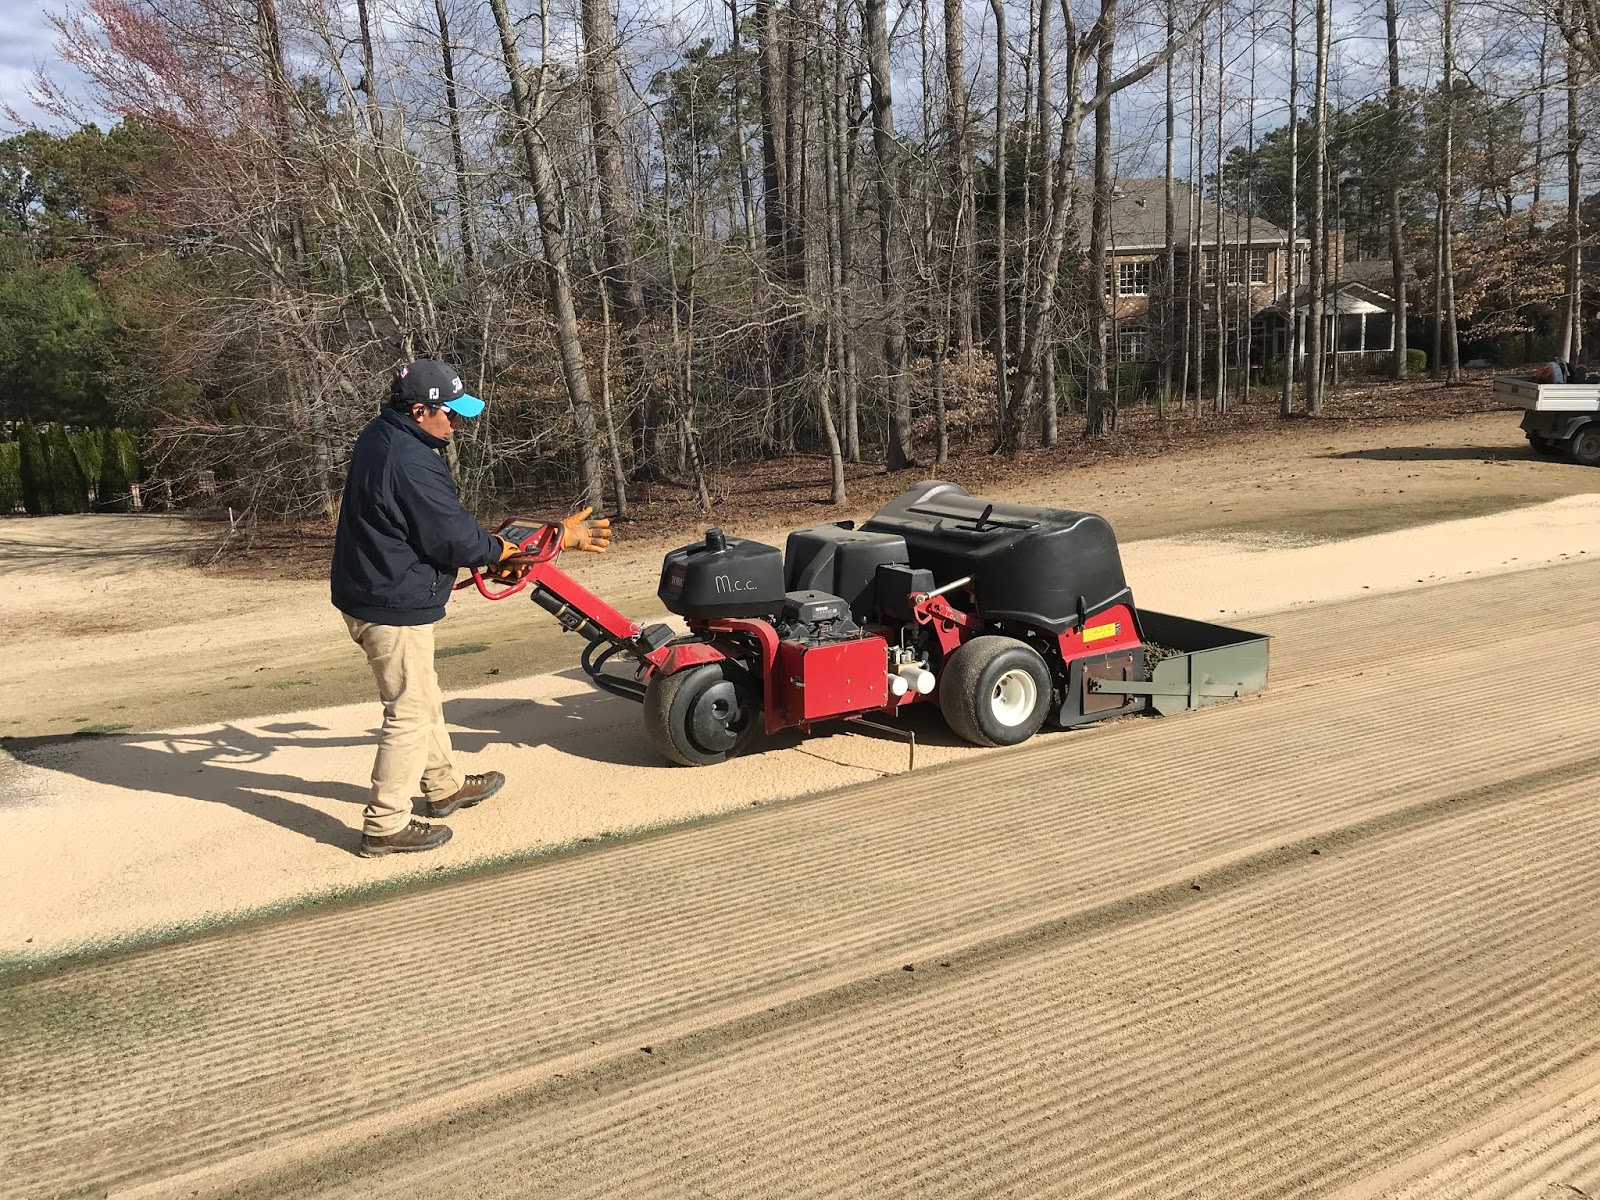
Here you can see the sand being evenly applied to the green surface.  We will apply almost 75 tons of sand to the greens during the process!

A before and after of the sand topdressing

The second step is to use the aerification machine to remove plugs from the green.  After the plug is removed there is a 3.5 inch deep hole left in the green.  This fresh new hole exposes the root layer of the grass to much needed air, sand, and nutrients. 

Here is a picture of the plugs removed from the green.  The gray box on the back of the machine actually collects the plugs as the aerifier works across the green.  Once the machine reaches the edge of the green, it lifts up and dumps the plugs.

Here you can see a crew of guys shoveling up the plugs to remove them after being dumped by the machine.  This photo is of the first green of the day right at daylight.

The next step once all the plugs have been cleaned off is to drag the sand into the holes.  This is done using a large brush which we pull behind a utility cart.

Here is a closer look at the brush.  This process really helps to get the sand into the holes and incorporated into the turf canopy.  The sand helps to add pore space to the soil profile for new roots to grow this Spring.  Sand also helps to smooth out the putting surface by filling any imperfections.  

Here is a closer look of the surface of the green after the process of dragging the sand into the green.  You will notice that almost every hole is full of sand, and there is a uniform layer of sand on top.  

After all the sand has been brushed into the holes, it is time for the roller to roll the green smooth.  This roller really helps to improve the putting surface after this entire process.  Many tire tracks and foot prints are smoothed out to start the recovery process off right.  We will roll the greens a few times over the next few weeks to continue to smooth the surface to improve play-ability and aid in a successful recovery.

Last but not least we add a few minutes of water to each green.  During this process of dragging and punching the greens the grass can sometimes get bruised up.  By keeping it moist throughout the next few weeks we can reduce any damage and also speed up recovery.  The rain has helped to aid this week in driving the sand into the greens profile, and we are already starting to see a lot of green grass peaking through.  As always, this aerification process takes the greens about 4 weeks to fully recover!    

Sunday, February 17, 2019

Spring Sod Projects

Spring is right around the corner, and that means the golf season is only a few weeks away!  Each year we try to remove a few trees in highly playable areas where the grass has a hard time growing.  The trees sometimes are simply too close to the fairways or greens, and cause a golfer hitting a good shot to have a terrible lie!  We try to identify these areas each year and install new sod each Spring to improve the playability.

Here is a look at #8 Overlook.  This picture is taken from about 150 yards out from the green, and about 40 feet or so from the edge of the fairway.  The fairway is barely visible in the right edge of the picture.  There are 3 large trees along the top of the hill where the thin rough ends into mulch.  This entire area is mostly mud and full of tree roots.  With the rain we have endured over the last 3 months this area has washed out even worse, with some of the mud making it all the way into the fairway.  Our plan is to remove the trees along the edge of the grass line and then sod the entire area along the top of the ridge to stabilize the soil.  By removing the trees and tree roots, we can solve the problem of thin turf and dirt, and drastically improve playing conditions.   

Here is a photo looking back towards the tee box on #8 Overlook.  You can see the tree roots protruding all along the ridge, resulting in a terrible lie should your ball end up any where near!  This area on #8 Overlook is just one example of the areas we will be working on over the next few weeks to be ready for our new sod this Spring.  We will also be adding grass next to #13 green complex, behind #7 Overlook green where we have already removed some trees to improve cart traffic, and left of the bunkers on #8 all the way to the creek.  We are aiming to have everything freshly sodded by the middle of March to be ready for the golf season!  

Sunday, February 10, 2019

Reminder! Greens Aerification February 25th!!!!!


Just a friendly reminder that our Spring Greens Aerification will be in two weeks!  This will be the large holes with heavy sand!  The greens are in great shape right now so take advantage of some good weather over the next few weeks and come play some golf!  We look forward to seeing you on the golf course!

Sunday, February 3, 2019

Concrete work this week

Cart path repairs are an ongoing process, and we surely have our fair share of cart paths to fix at MCC!  Each year we budget money in the capital budget to fix these cracked and bumpy concrete panels, and this week we started on a few areas.  There will be much more cart path work to come, but these areas needed done ASAP.

This section on #1 was really broken and a severe bump if you were to hit it unknowingly

Now it is smooth riding!

We added some concrete to both sides of the cart path at #17 tee.  A section of the old curb washed out badly, making it a tough step to get to the green and white tee boxes.
With some minor grading this curbing should be a huge help!  
Our crew added some nice fescue sod to the left side to prevent erosion and also improve the area!
This bridge connection was also part of the concrete finished last week!

Where is #9 fountain?


Over the last few weeks I have had a few people ask where out fountain went in the pond on hole #9.  This fountain is very visible from the Clubhouse, especially at night.  Believe it or not this fountain was purchased by MCC in 2003, and the motor and pump which sprays water in the air has simply ended its useful life.  Electrical issues at the breaker box helped us diagnose a blown motor, and then once we removed the fountain we noticed the pump itself was almost completely worn out.  Have no fear, as we have contacted the company who is sending us everything we need to fix the problem!  We should have back in the pond in a week or two, ready for the warm weather!

#2 Overlook bridge almost finished!

This week we did a lot of work to try to repair the bridge on #2 Overlook.  The bridge had been badly washed out under one side, so we had to do something to prevent further damage.  I will show you in the pictures how we went about fixing the problem!
First thing we had to do was remove the panel of concrete that connected the cart path to the bridge.  This was the concrete which was completely washed out underneath.  You can see in this picture the large void between bridge and concrete.  The main irrigation line is the large yellow pipe in the picture.  Our crew was very careful not to damage this pipe at all!

This is another photo showing the large area which was washed out under the concrete.  You can see some pieces of concrete laying in the bottom that fell in the void when we were removing.
Once we had all the concrete removed from the hole, it was time to build the walls.  We used some large boards to give us a wall to hold the dirt and prevent from ever washing out again.
We then installed a plastic sheeting along the wall for further protection and erosion prevention!

When it was time to back fill the area with dirt, we methodically tamped the dirt each time we dumped.  By tamping the dirt we can assure the least amount of settling possible.
On the water side of the boards, we decided to install some rip-rap along the bottom of the wall.  We hope this will prevent any dirt washing out from underneath the wall.  

This is still a work in progress, as we still have to back fill with dirt and rocks along the "wing walls" of the bridge.  The rocks should help protect the wall from the water currents during heavy rains.
Last but not least the new concrete is poured to re-connect the cart path to the bridge.  

Here is a view of the downstream side of the bridge.  We will also back fill this wall with dirt and rocks next week to finish the project.